
How I Built a Real-Time Polling App Using Laravel and Livewire (And Why It Took Me Three Tries)
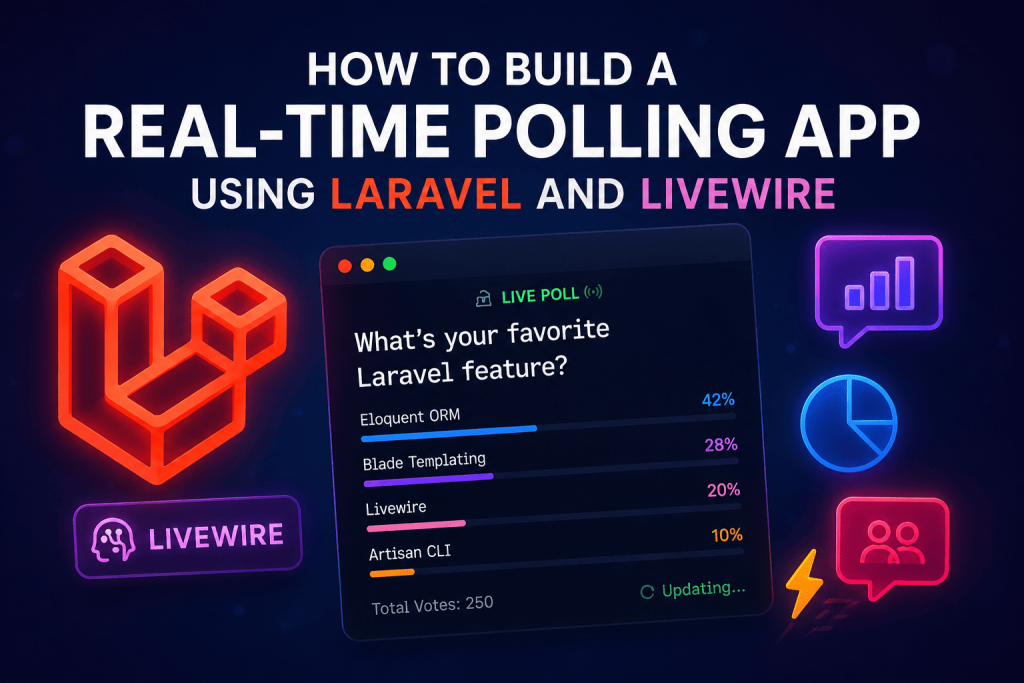
Last year, my cousin’s college society asked me to build them a quick voting app for their annual elections. Nothing fancy, they said. Just a page where students vote for their favorite candidate and everyone can see the results update live, like those Twitter poll graphics but on a website.
I said yes without thinking too much about it. Big mistake. Or actually, a good mistake, because it taught me a lot.
My first instinct was to reach for React and build a whole separate API with Laravel. Then I’d need WebSockets, a frontend build pipeline, state management, the works. I spent almost two full evenings just setting up the boilerplate before I’d written a single line of actual poll logic. That’s when a friend who does Laravel professionally told me, “Bhai, just use Livewire. You don’t need a separate frontend for this.”
I was skeptical. I’d heard of Livewire but always assumed it was for simple CRUD forms, not something that needed real-time updates. Turns out I was wrong, and this small polling app is actually a perfect use case for it.
So here’s everything I learned building this thing, mistakes included, so you don’t waste two evenings like I did.
Why Livewire Actually Makes Sense for This
Livewire lets you write dynamic, reactive interfaces using plain PHP, without writing a separate JavaScript API. Your Blade templates stay mostly the same, but they become “alive” because Livewire handles the AJAX requests behind the scenes automatically.
For a polling app specifically, this matters because:
- You don’t need to build a REST API just to fetch vote counts
- Livewire components can be told to refresh themselves automatically (this is huge for “live” results)
- Broadcasting events (using Laravel Echo and Pusher, or the free alternative Laravel Reverb) can push updates to everyone watching the poll without them refreshing the page
That last point is really what makes it feel “real-time” instead of just “AJAX every few seconds,” though honestly, for smaller apps, even simple polling intervals work fine and are way easier to set up.
What You’ll Need Before Starting
I’m assuming you already have basic PHP and Laravel knowledge. If you’ve built even a simple to-do app before, you’re good. Here’s the stack I used:
- Laravel 11 (this works fine on Laravel 10 too)
- Livewire 3
- MySQL (I used the free XAMPP setup on my Windows laptop, an old Dell Inspiron that still somehow runs everything I throw at it)
- Laravel Reverb for broadcasting (this is Laravel’s own WebSocket server, and it’s free, unlike Pusher which charges once you cross their free tier limits)
If you don’t want to deal with broadcasting at all initially, you can skip Reverb and just use wire:poll to refresh every few seconds. I’ll show both approaches because honestly, for smaller internal apps, the polling approach is often good enough and way less of a headache.
Step 1: Setting Up the Project
Nothing unusual here. Fresh Laravel install, then pull in Livewire.
composer create-project laravel/laravel polling-app
cd polling-app
composer require livewire/livewire
Then publish the Livewire config if you want to tweak anything later:
php artisan livewire:publish --config
Step 2: Building the Database Structure
A poll needs at least three things: the poll itself, the options people can vote for, and a record of who voted for what.
I created three migrations:
php artisan make:model Poll -m
php artisan make:model PollOption -m
php artisan make:model Vote -m
The polls table just needs a question column and maybe a is_active boolean so you can close voting later.
The poll_options table needs poll_id and a label (the actual option text, like “Ali Khan” or “Sara Ahmed” in my case).
The votes table needs poll_option_id and something to identify the voter, I used ip_address combined with a session check, since I didn’t want to force students to create accounts just to vote. This isn’t bulletproof against people voting twice from different devices, but for a small college poll, it was good enough. If you’re building something for a bigger audience, you’ll want proper user authentication tied to votes.
Run your migrations:
php artisan migrate
Step 3: Creating the Livewire Component
This is where the actual magic happens.
php artisan make:livewire PollShow
Inside PollShow.php, I fetch the poll and its options, and handle the vote submission:
class PollShow extends Component
{
    public Poll $poll;
    public $hasVoted = false;

    public function mount(Poll $poll)
    {
        $this->poll = $poll;
        $this->hasVoted = Vote::where('ip_address', request()->ip())
            ->whereIn('poll_option_id', $poll->options->pluck('id'))
            ->exists();
    }

    public function vote($optionId)
    {
        if ($this->hasVoted) {
            return;
        }

        Vote::create([
            'poll_option_id' => $optionId,
            'ip_address' => request()->ip(),
        ]);

        $this->hasVoted = true;
        $this->dispatch('vote-cast');
    }

    public function render()
    {
        return view('livewire.poll-show', [
            'options' => $this->poll->options()->withCount('votes')->get(),
        ]);
    }
}
The Blade view is simple too. Loop through the options, show a button for each, and display a progress bar based on vote percentage.
Step 4: Making It Actually Feel Live
Here’s where I made my first real mistake. I initially just relied on wire:poll.5s on the results section, which refreshes the component every five seconds. It worked, but it felt clunky. Every five seconds the whole component would flicker slightly as it re-rendered, and on a slower connection (I tested this on my phone using a weak mobile data connection just to see how it’d behave for students in the hostel), it felt laggy.
So I switched to actual broadcasting using Laravel Reverb.
First, install and configure Reverb:
php artisan install:broadcasting
This sets up Reverb automatically along with the .env variables you need. Then in your Vote model or the component, fire an event whenever a vote is cast:
event(new VoteSubmitted($this->poll));
And in your Livewire component, listen for it using Livewire’s #[On] attribute so the component refreshes only when there’s actually a new vote, not on a fixed timer.
The difference was night and day. Results updated within a second of someone voting, and there was no flickering because it wasn’t polling the server constantly, only reacting to actual events.
Lesson learned: wire:poll is fine for prototypes or low-traffic internal tools, but if you want something that genuinely feels real-time, broadcasting is worth the extra half hour of setup.
Step 5: Preventing Duplicate Votes (Sort Of)
I mentioned this earlier, but it’s worth its own section because I got this wrong the first time.
My first version only checked session data to block repeat votes. The problem? Anyone could just open an incognito window and vote again. I only realized this when my cousin texted me laughing, saying he’d voted three times for the same guy just to test it.
I added IP-based checking alongside session checking. It’s still not perfect, people on the same college WiFi network sometimes share the same public IP, which caused a few false “you already voted” errors for legitimate students. If I rebuild this again, I’d add simple email verification with a magic link, since that’s a much more reliable way to prevent duplicate votes without requiring full account creation.
Common Mistakes I’d Tell You to Avoid
Not indexing your votes table. Once the poll got around 800 votes, counting queries started slowing down noticeably. Adding an index on poll_option_id fixed it instantly.
Forgetting to debounce the vote button. Students on phones tapped the vote button multiple times because there was no loading state. Add wire:loading.attr="disabled" on your button so it can’t be double-clicked while the request is processing.
Testing only on localhost. Everything worked perfectly on my laptop, but the moment it went live on shared hosting, Reverb’s WebSocket connection didn’t work because the hosting provider didn’t support persistent WebSocket connections on the shared plan. I ended up deploying just the broadcasting server separately on a small VPS, which cost around 800 PKR per month (roughly 240 Indian rupees) for the cheapest DigitalOcean-equivalent droplet from a local provider. Worth checking your hosting provider’s WebSocket support before you build the whole broadcasting layer.
Not handling closed polls. I forgot to disable voting once the poll deadline passed, so people kept voting for almost a day after results were supposed to be final. Add a simple check using is_active and a closes_at timestamp, then hide the vote buttons and just show results once that time passes.
Real-World Use Cases Beyond College Elections
Once I built this, I realized how many small projects actually need this same pattern:
- Live audience polls during webinars or workshops
- Quick internal team decisions (“Should we order pizza or biryani for Friday lunch”)
- Event feedback collection with instant visual results
- Small business customer satisfaction polls embedded on a website
None of these need a heavy dedicated polling SaaS subscription. A lightweight Laravel and Livewire setup handles all of them comfortably, and you own the data instead of it sitting on some third-party platform.
Final Thoughts
Honestly, this project changed how I think about “real-time” features in general. I used to assume anything live needed a separate JavaScript frontend and a proper API. Livewire proved that wrong for a huge chunk of use cases, especially anything that isn’t a massive, highly interactive single-page app.
If you’re building something similar, start simple. Get the voting and counting logic working first with plain page refreshes. Then add wire:poll if you need something quick and don’t want to deal with broadcasting. Only reach for Reverb or Pusher once you actually need that instant, no-delay feel, and once you’ve confirmed your hosting can support WebSocket connections.
And test with real people before launch day. My cousin’s triple-voting incident saved me from a much bigger embarrassment on actual election day.