
Why I Ditched Laravel Breeze and Built My Own Auth System (Step-by-Step Guide for Laravel 11/12)
A client messaged me at 11 PM asking why users could log in even after their subscription expired. I checked the code, and yep, I’d used Laravel Breeze straight out of the box without customizing the login logic. It worked great for a normal SaaS login, but this client needed to block expired accounts, log every failed login attempt, and redirect different user roles to completely different dashboards.
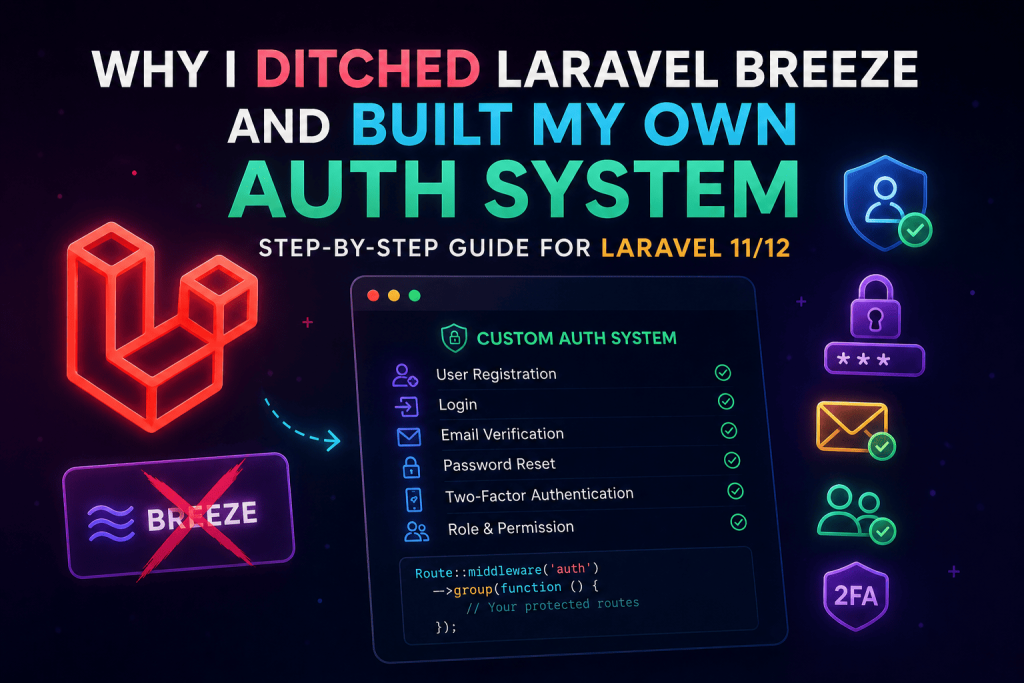
Breeze wasn’t built for that out of the box. Fortifying it further felt like fighting the package instead of working with it. That’s the night I decided to stop relying on scaffolding packages for anything beyond simple projects and actually learn how Laravel’s auth system works underneath.
If you’ve ever felt like Breeze, Jetstream, or Fortify are “magic boxes” that work until they don’t, this guide is for you. I’ll walk through building custom authentication from scratch in Laravel 11/12, the same way I rebuilt that client’s login system afterward.
Why Bother With Custom Auth At All
Laravel’s starter kits are genuinely good for 80% of projects. If you’re building a basic app where users just sign up, log in, and reset passwords, use Breeze and move on with your life. I’m not saying otherwise.
But the moment you need any of these, custom auth becomes worth the extra effort:
- Role-based redirects (admin goes to one dashboard, regular users to another)
- Extra validation like checking subscription status or account approval before allowing login
- Custom fields during registration (phone number verification, referral codes, business details)
- API-based authentication for a mobile app alongside your web app
- Rate limiting login attempts beyond Laravel’s default throttle
Once your project has two or three of these, trying to bend a starter kit to fit usually takes longer than just writing it yourself.
What You Actually Need to Understand First
Before touching code, here’s the part that took me embarrassingly long to properly understand: Laravel’s authentication isn’t really “one system.” It’s a bunch of small, swappable pieces working together.
- Guards decide how a user gets checked for each request (session-based for web, token-based for API)
- Providers decide where user data comes from (usually your
userstable via Eloquent) - The Auth facade is just the thing you call to log people in and out
Once this clicked for me, building custom logic stopped feeling scary. You’re not reinventing Laravel’s auth, you’re just writing your own controller logic around the pieces Laravel already gives you.
Step 1: Fresh Laravel Setup
I’ll assume Laravel 11 or 12 is already installed. If not:
composer create-project laravel/laravel custom-auth-app
cd custom-auth-app
Laravel 11 changed a few things compared to 10, mainly simplifying the folder structure and removing some default middleware files. Don’t panic if you’re used to older versions and can’t find Kernel.php, a lot of that config moved into bootstrap/app.php now.
Step 2: Setting Up the Users Table
Run the default migration first, then add whatever custom fields your app needs.
php artisan migrate
For my client’s project, I added an is_approved boolean and a role column:
php artisan make:migration add_role_and_approval_to_users_table
Schema::table('users', function (Blueprint $table) {
    $table->string('role')->default('user');
    $table->boolean('is_approved')->default(false);
});
Step 3: Building the Registration Logic
Skip the Breeze controllers entirely. Create your own:
php artisan make:controller Auth/RegisterController
Inside, keep it simple and readable:
public function store(Request $request)
{
    $validated = $request->validate([
        'name' => 'required|string|max:255',
        'email' => 'required|email|unique:users,email',
        'password' => 'required|min:8|confirmed',
    ]);

    $user = User::create([
        'name' => $validated['name'],
        'email' => $validated['email'],
        'password' => Hash::make($validated['password']),
        'is_approved' => false,
    ]);

    Auth::login($user);

    return redirect('/pending-approval');
}
Notice I’m setting is_approved to false by default. This was one of the client’s actual requirements, new accounts had to be manually approved before they could access anything. Small detail, but it’s the kind of thing you can’t easily bolt onto a starter kit without digging into their internals.
Step 4: Custom Login Logic
This is where the real customization happens.
public function store(Request $request)
{
    $credentials = $request->validate([
        'email' => 'required|email',
        'password' => 'required',
    ]);

    if (!Auth::attempt($credentials)) {
        return back()->withErrors([
            'email' => 'These credentials do not match our records.',
        ]);
    }

    $user = Auth::user();

    if (!$user->is_approved) {
        Auth::logout();
        return back()->withErrors([
            'email' => 'Your account is still pending approval.',
        ]);
    }

    $request->session()->regenerate();

    return match ($user->role) {
        'admin' => redirect('/admin/dashboard'),
        'manager' => redirect('/manager/dashboard'),
        default => redirect('/dashboard'),
    };
}
This is the exact structure I used for that client project. Once I added the approval check and role-based redirect, the whole “expired account logging in” issue disappeared, because now every login goes through checks that Breeze’s default controller never had.
Step 5: Protecting Routes Based on Role
Don’t just rely on redirects after login, someone could still manually type in /admin/dashboard in the URL bar. I learned this the hard way when a regular user on a test account accidentally landed on an admin page just by guessing the URL.
Create a simple middleware:
php artisan make:middleware CheckRole
public function handle($request, Closure $next, $role)
{
    if ($request->user()->role !== $role) {
        abort(403);
    }
    return $next($request);
}
Register it in bootstrap/app.php (this is the Laravel 11/12 way, unlike older versions where you’d add it in Kernel.php):
$middleware->alias([
    'role' => \App\Http\Middleware\CheckRole::class,
]);
Then apply it to routes:
Route::middleware(['auth', 'role:admin'])->group(function () {
    Route::get('/admin/dashboard', [AdminController::class, 'index']);
});
Step 6: Adding API Authentication (If You Need It)
For the mobile app version of that same client’s project, I needed token-based auth alongside the web login. Laravel Sanctum handles this well without needing full OAuth complexity.
composer require laravel/sanctum
php artisan vendor:publish --provider="Laravel\Sanctum\SanctumServiceProvider"
php artisan migrate
Then in your API login controller:
public function login(Request $request)
{
    $request->validate([
        'email' => 'required|email',
        'password' => 'required',
    ]);

    $user = User::where('email', $request->email)->first();

    if (!$user || !Hash::check($request->password, $user->password)) {
        return response()->json(['message' => 'Invalid credentials'], 401);
    }

    $token = $user->createToken('mobile-app')->plainTextToken;

    return response()->json(['token' => $token]);
}
This let the mobile team consume the same user table without duplicating logic, they just hit the API endpoint and got a token back instead of a session cookie.
Mistakes I Made (So You Don’t Have To)
Forgetting to regenerate the session after login. Without $request->session()->regenerate(), you’re leaving the app open to session fixation attacks. I skipped this once early on and only caught it during a basic security review.
Not rate-limiting login attempts. Someone could hammer the login form with password guesses all day. Laravel makes this easy to fix:
Route::post('/login', [LoginController::class, 'store'])
    ->middleware('throttle:5,1');
This limits login attempts to 5 per minute per IP, simple but effective.
Storing role checks only in the frontend/Blade views. I once hid the admin menu link using a Blade @if check, but forgot to protect the actual route. Anyone who knew the URL could still access it. Always protect at the route/middleware level, never rely on hiding a button as your only security measure.
Not testing the “forgot password” flow properly. I built custom login and registration but initially forgot users still need a way to reset passwords. Laravel’s built-in Password facade handles most of this for you, don’t rebuild it from scratch unless you have a very specific reason.
Password::sendResetLink($request->only('email'));
Hardcoding role names as strings everywhere. I typed “admin” as a string in like six different files before realizing a typo in one place would silently break things. Using a simple enum or constants file for roles saves you this headache:
class UserRole
{
    const ADMIN = 'admin';
    const MANAGER = 'manager';
    const USER = 'user';
}
Real Use Cases Where This Actually Matters
Beyond that client project, I’ve reused this same pattern for:
- A local tuition center’s portal where teachers, students, and admins each needed completely different dashboards
- A freelance marketplace where users had to be manually verified before they could bid on projects
- A small e-commerce backend where vendor accounts needed approval before their products went live
None of these needed some huge enterprise auth system. Just Laravel’s existing Auth facade, a couple of extra database columns, and controllers written with the actual business logic in mind instead of generic scaffolding.
Final Thoughts
Building auth from scratch sounds intimidating the first time, especially if you’ve only ever used Breeze or Jetstream. But once you actually sit down and write the login logic yourself, you realize Laravel already gives you every tool you need, hashing, session handling, guards, everything. You’re just arranging them around your actual business rules instead of someone else’s assumptions about what your app needs.
Start small. Get basic register and login working with your own controllers first, then layer on the role checks, approval logic, or API tokens as your project actually demands them. Don’t build for requirements you don’t have yet.
And test your role-based routes by literally typing the URLs in as a lower-permission user. It takes two minutes and it’s saved me from shipping embarrassing security holes more than once.